Although small drips from your taps might not seem that much. If you add them all up after weeks or months, you may have wasted a considerable amount of water and money. Living in a dry country like Australia, water is considered extremely precious. So, when a tap is leaking, it’s best to address it sooner rather than later.
In this post we look at some of the main causes of a leaky tap, how to prevent them and how to fix them. Rest assured you can always call a local Ipswich based plumber to fix your taps for you if you prefer.
Causes of a leaky tap
It’s difficult to diagnose the cause of your particular leaky tap without actually inspecting it but here are some of the most common causes. In general, there are three major reasons for leaky taps. It could be any of the following:
• Washer – One of the common causes of a leaky tap is a worn-out washer. The washer is pushed onto the valve seat and the frictions cause it to wear out.
• O-ring – This can become loose over time and water leaks near the handle.
• Valve seat – Water sediments accumulate and cause the valve seat to corrode. When this happens the water leaks around the spout area.

There are also other causes of why your tap is leaking. Depending on the type of your tap, the cause of the water leak could be any of these:
• Cartridge – This is responsible to control the water’s flow and temperature. It can also deteriorate after a while and should be replaced.
• Water pressure – If there’s a high-water pressure in your property, it could cause a leaky tap. It restricts the water from flowing smoothly to its destination and also causes the pipes to get backed up with water.
• Loose parts – Frequent use could cause the tap parts to become loose. This can be easily fixed by tightening the pieces of the tap together.
How to prevent a tap from leaking
If you have regular taps which require turning multiple rotations to stop the water flow, turn your taps off slowly and just enough to stop the water flow. Try not to over tighten the taps. Just turn them enough to stop the water flow. Over tightening will lead to premature washer wear and could eventually lead to damage to the valve seat.
Remember since the tap is located “upstream” of the spout even when the tap has been completely turned off water which has made it passed the tap will continue to flow out of the spout. Hence, there will be a slight delay from when the tap has been turned off and the water stops flowing. Thanks why it’s a good idea to turn taps of slowly.
If you have the modern flicker style taps it’s good practise to also turn these off slowly. Quickly turning them off causing the water flow to abruptly stop possibly causing water hammer and in general greater wear and tear on the inner parts of your tap.
You can also do regular visual checks and see if there are signs of leaky taps around your home. That way you can address them early on and prevent any potential further damage. Usually, leaks leave a trace where mould forms or wall discolouration is evident.
How to fix a leaky tap
Based on the top causes of the leaky tap, we will share with you how to properly fix it. Before anything else, prepare the things you will most likely need.
You may need different sized nuts, a set of pliers or adjustable wrench, replacement parts that match the ones on the leaky tap. You can also purchase a tap repair kit. Here are the steps to follow:

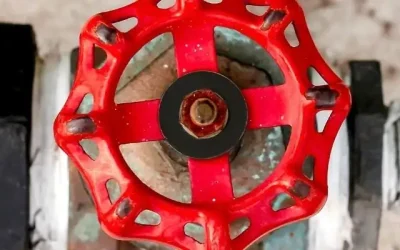
1. Turn off the water supply from the mains
Make sure to stop all the flow of water around your house by turning the mains off. If you live in a house you’ll typically find the main water valve located in your front yard next to the street. If you live in a flat or townhouse, the mains tap should be inside your residence, such as the laundry or the bathroom.
2. Drain the water from the pipes
Release all the remaining water by opening any tap in your house. This will also ensure that the water has stopped running. If the water hasn’t stopped, it is best to call a licensed plumber to do the tap repair as there could be more complex issues.
3. Remove the headgear
Using a plier or wrench, unscrew the headgear nut. Hold the tap using your other hand to stop it from spinning as you undo the nut. Otherwise, it could loosen the tap’s connection to the plumbing.
4. Take off the old washer
Remove the old washer using a screwdriver. Then with the needle-nose pliers replace the body washer and the O-ring.
5. Reassemble
After replacing the old parts, reassemble them to complete the repair. You can also put some silicone lubricant on the spindle and the threaded areas.
6. Turn the water supply back on
Open the repaired tap halfway first before slowly turning on the water supply at the mains. Turn off the tap gently.
If the tap is still leaking, you may need to contact your licensed plumber to fix your leaking tap. But if you were able to fix it successfully, you’ve saved money from hiring a plumber. In addition to that, you saved yourself from costly water bills and helped the environment by conserving water too.
Looking for a local Ipswich plumber? Get a free quote from plumbing Ipswich today. We’ve got experience and expertise to get to the bottom of your leak and get it fixed with minimal disruption to your home. Give us a call today for a free quote!

Looking for a plumber?
To fix your leaking taps? If your located in the Ipswich area call us now and let a professional plumber fix your leaks.